This blog is a re-blog of Eric Swithinbank’s wonderful account of his time working in the woods as a Natural England trainee. We have worked together on a variety of tasks and it has been an absolute pleasure to be involved with this very worthwhile scheme, over to Eric….
Working Woodlands
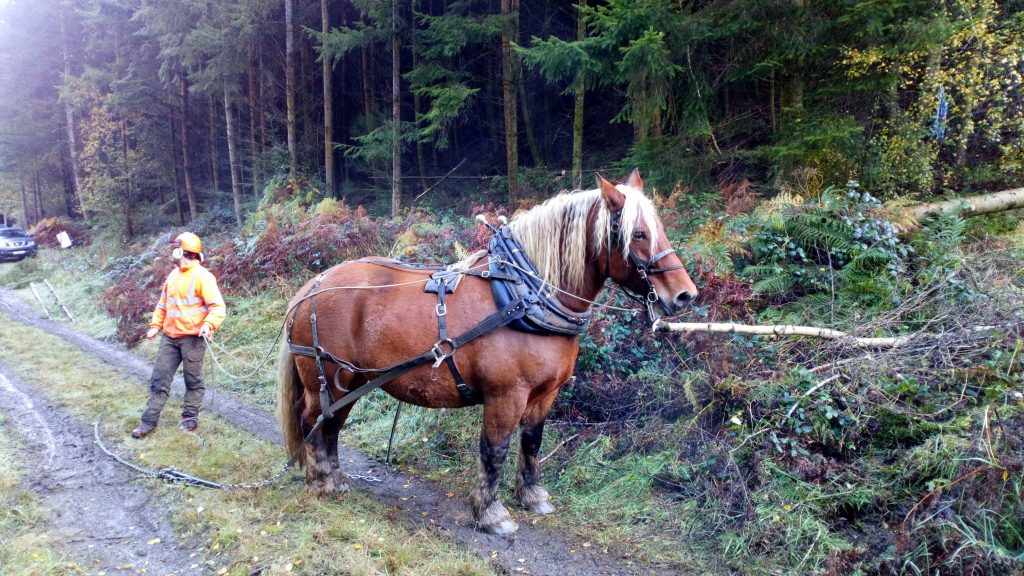
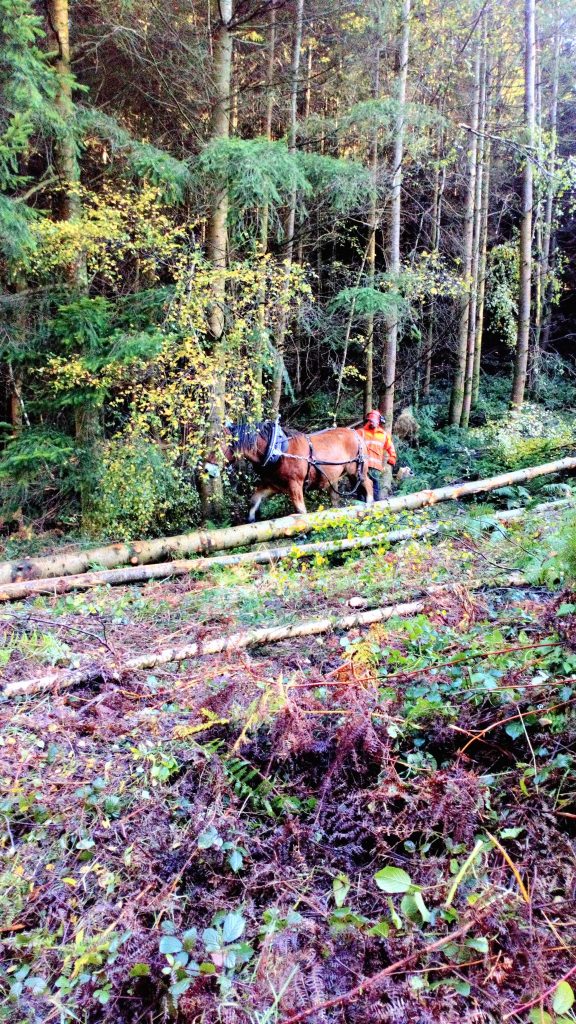
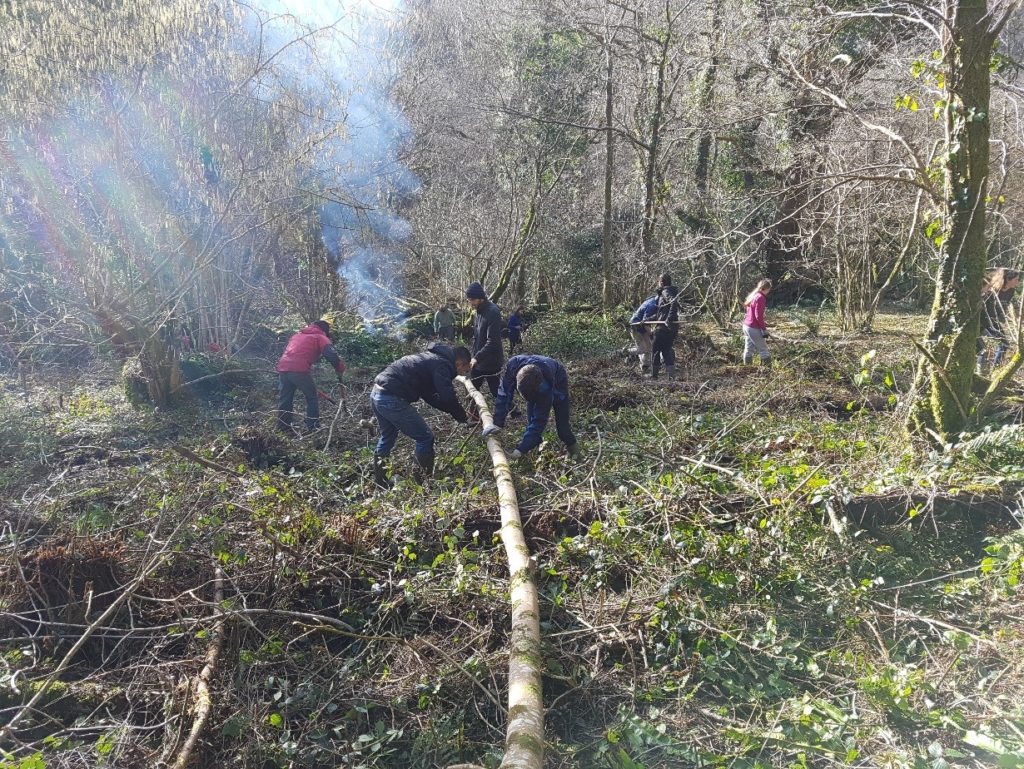
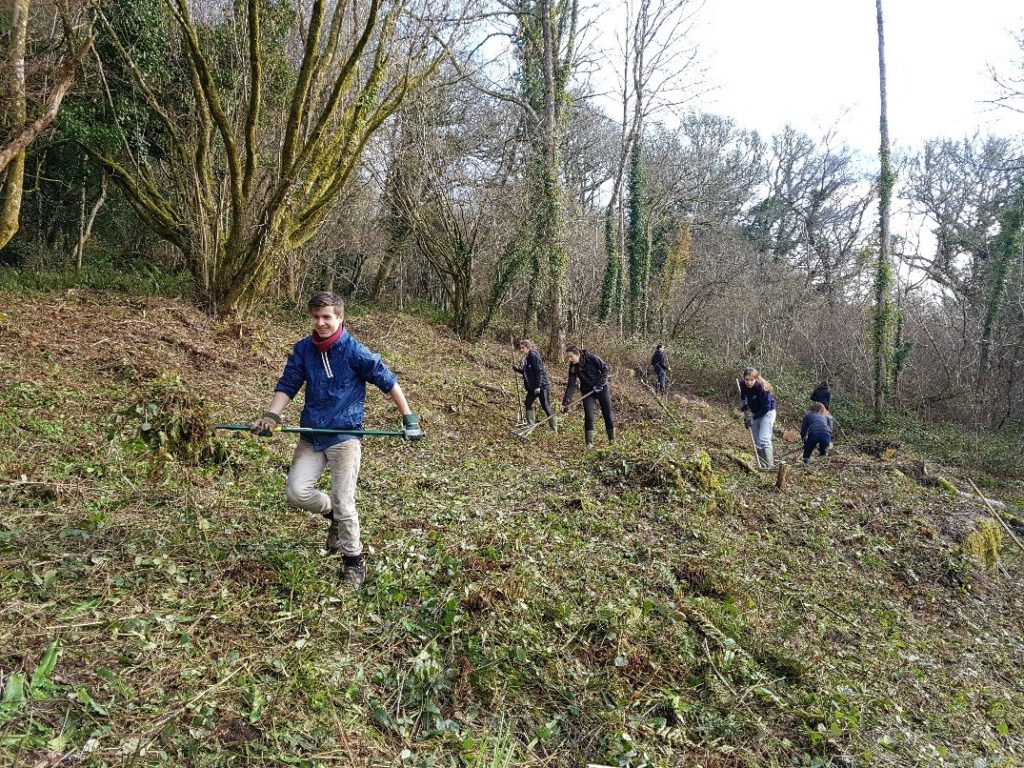
In the dense broadleaf woodland of the Bovey valley, tucked away on a south facing slope just above the river lies the remains of an old farmstead – Boveycombe Farm. The farmstead and field systems have records dating as far back as 1332 all the way up until the 1940’s when some of the fields were farmed for potatoes. Since then, the farm has become engulfed by the surrounding woodland. Myself, Daniel and Tristan (full time trainees at East Dartmoor NNR) have been working with local Woodland Trust contractors Jim White and Alasdair Kilpatrick to uncover the archaeology of the farm buildings and field boundaries as well as clearing some of the vegetation within the old field systems to create a woodland glade; an important habitat for many woodland species which make the most of the sunlight accessible due to the break in the canopy. With a sheltered, sunny location on a south facing slope and easy access to water, it is easy to understand why people settled here. In fact whilst working at the farmstead this winter, we sat down to enjoy our lunch in the surprisingly warm December sun and observed a red admiral butterfly!
Coming from a nature conservation background it has been eye opening to work with Alasdair and Jim who offer perspective on how woodlands can be productive in a sustainable way. Alasdair uses wood that he sources from his work as a forester to craft furniture, tools and equipment using traditional green woodworking techniques. He also runs green woodworking courses at his workshop in Fingle Woods. The work at Boveycombe provided some high quality green wood, as well as some thin ash poles which Alasdair utilised for his pole lathes.
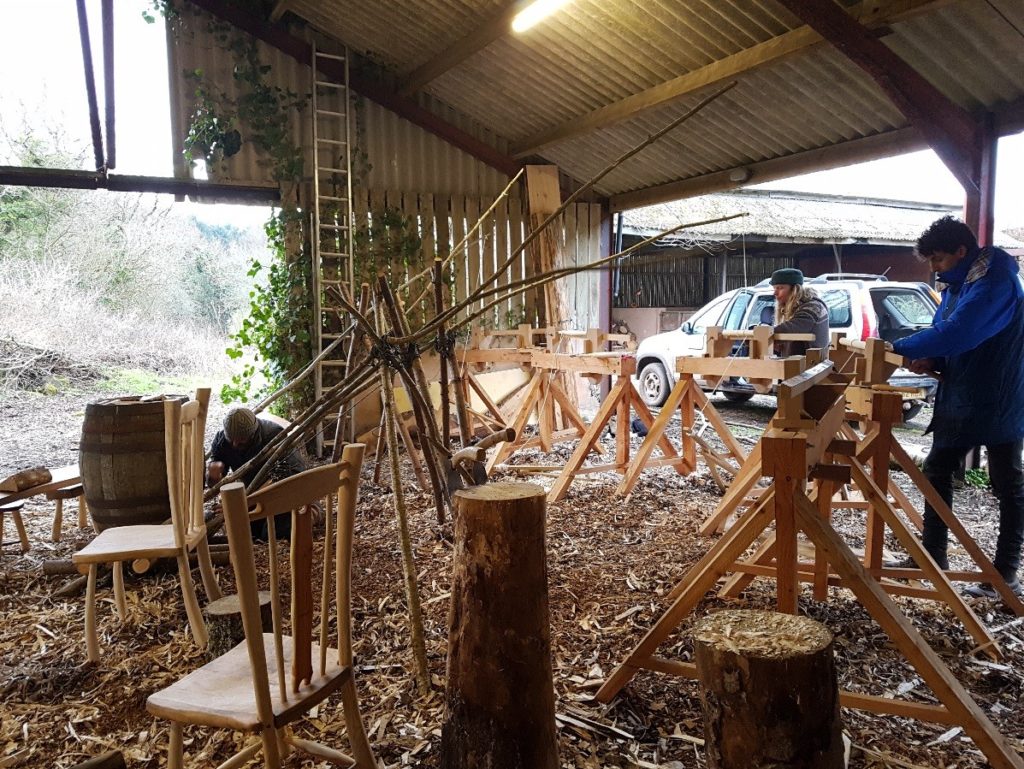
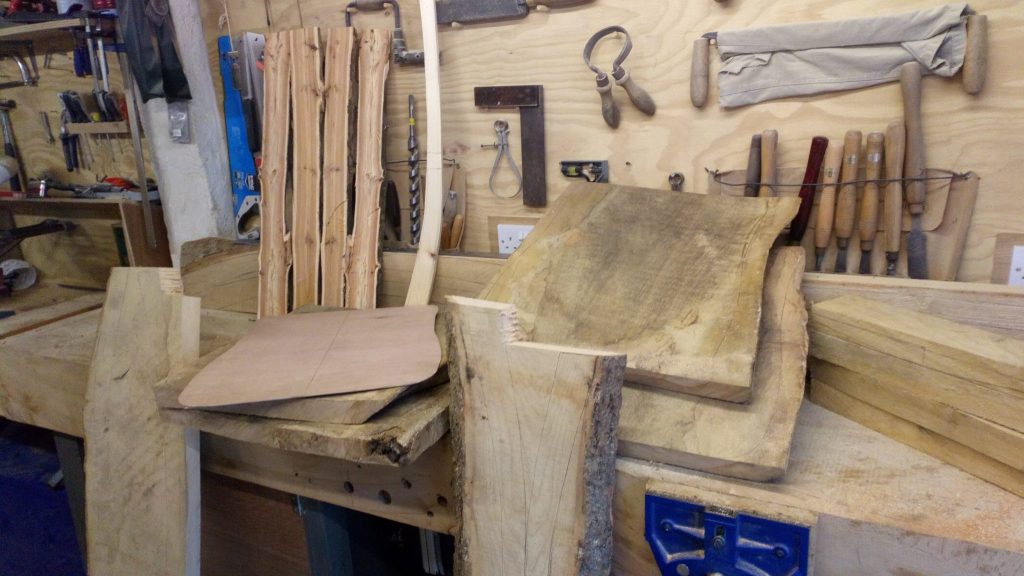
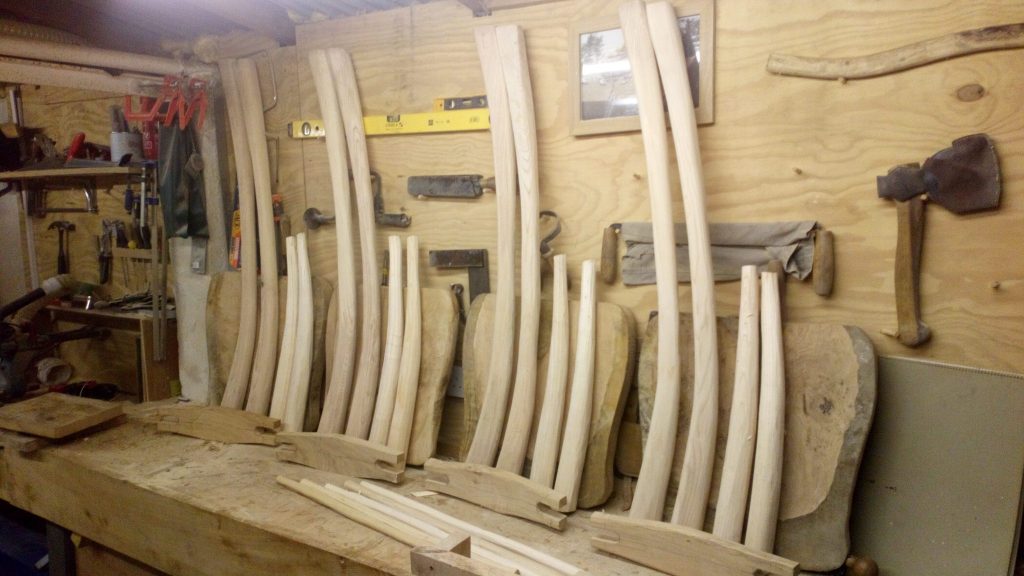
Alasdair invited us to spend some time at his workshop where he started by explaining some of the basic principles of green woodworking. He noted that when using traditional techniques that do not involve power tools, it is important to work with the wood and recognise that it is not an inanimate mass with which you impose your will on. In many ways, it still reacts like a living material, with cell structures that will shrink or swell when dried or exposed to water. How the tree grew dictates how it behaves as a material, for example if a tree has twisted and turned to reach the light there will be various tensions at play. Trees are naturally strong along the direction in which they have grown which can be observed as the grain in the wood. This must be considered when working the wood and it is for this reason that the Shipwrights of old would walk amongst woodlands and select the oak trees which matched the shape they needed for ship building.We spent some time with Alasdair examining cleft (split) wood and observed how the sapling still exists within the large trunk, merely swallowed up and expanded upon after seasons upon seasons of growth, the change of which are expressed in growth rings. Each year the story of growing conditions can be observed in the rings; with the stresses and pressures of each season etched into the material we are working with. Luckily for us, the ash wood we sourced from Boveycombe Farm was remarkably straight as it had grown up amongst the canopy, shooting upwards to get to the light. We used the traditional greenwood working techniques such as cleaving (splitting), side axing, draw knifing and pole lathing to craft the components we needed to create our own shaving horse (A bench that doubles as a vice when draw knifing).

For me, discovering green woodworking has been an extension of ecology and nature conservation. Learning about how different tree species react as timber has complemented my knowledge of their ecology, fleshing out my understanding of their role within a woodland, as well as understanding their textures and how they behave. For example pioneer species such as birch and alder grow quickly and are short lived, therefore they are less dense and can be worked more easily. Slow growing climax community species such as oak or holly are much denser, thus are harder to work but provide more strength in some situations.
Utilising wood in this way can act as a circular economy and provides a sustainable renewable resource with which gates, fences, hand rails, benches, steps, etcetera can be crafted on site. These will eventually return to the soil from which they originated and nurture future trees. It localises the whole process, for example the shaving horse we crafted with wood from Boveycombe farm is being used back at East Dartmoor Woods to fix tool handles which are being used to further the management at Boveycombe. Green woodworking requires no large, loud and expensive machinery or protective equipment; it is pleasurable and can be done socially with a group of volunteers. In contrast, wood sourced from building suppliers has been grown in commercial forests of little nature conservation value, harvested with large machinery, transported, treated and costs money.
The UK has a notably low (but increasing) woodland cover of 12.9% compared with the European average of 25% to 37%; especially considering that native broadleaf cover only accounts for 29% of our woodlands, the rest being conifers. However the situation is improving with organisations such as the Woodland Trust working to increase and improve the quality of our UK woodlands by, for example, converting coniferous woods back to native broadleaf woodlands. Perhaps we can increase our beautiful, ecologically diverse native woodlands and still gain some productivity from them. It has been a pleasure to explore the practical side of managing woodlands combining ecology, practical management and craftsmanship. Working woodlands in this way benefits the environment, finances and keeps traditional green woodworking craftsmanship alive – a real win-win!
- It’s important to note that the timber we use for green woodworking is a by-product from woodland management for nature conservation. The majority of wood is left as dead wood, a vitally important habitat in its own right. The techniques used ensure that the process remains small scale and sustainable.
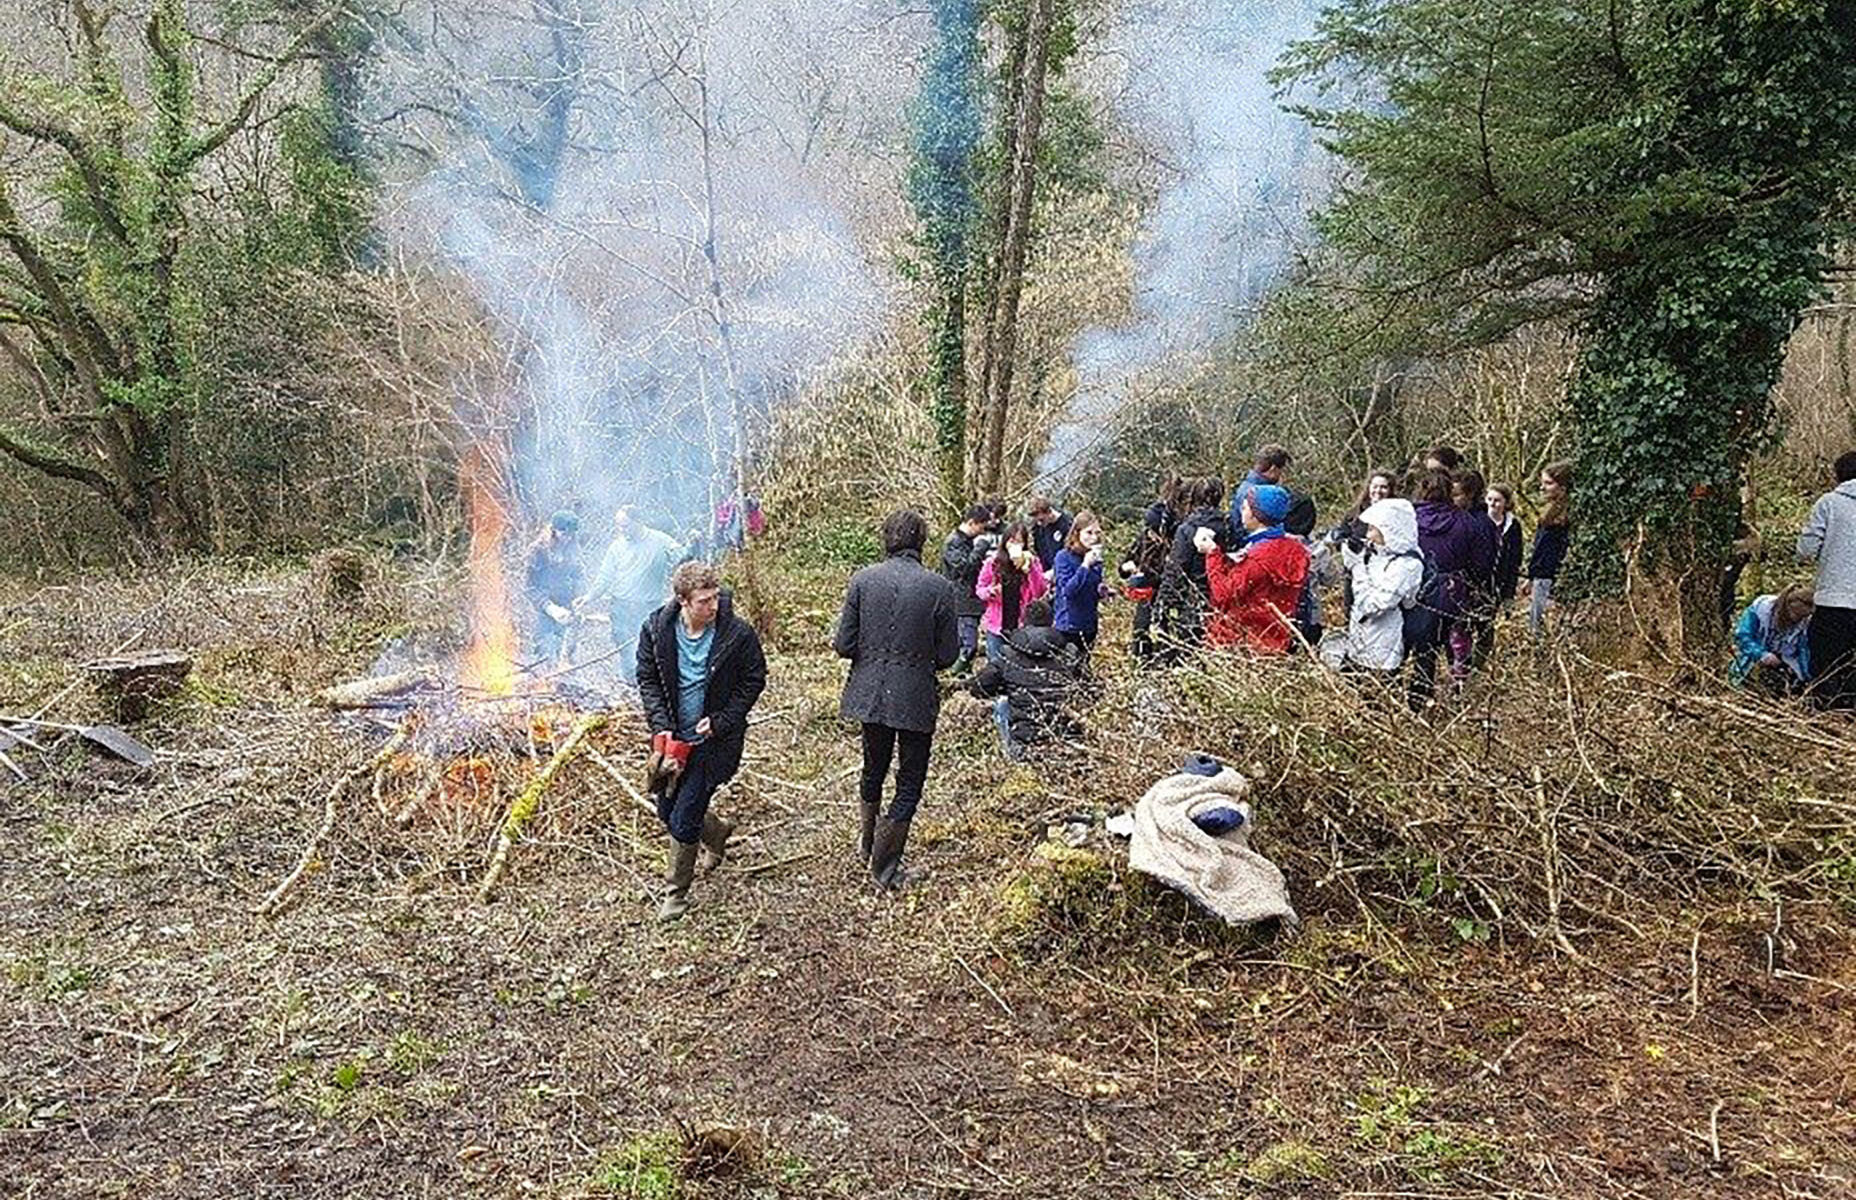
For demonstrations of green woodworking and much more why not come along to our spring woodland festival at Yarner Woods on the 19th of May.
For more information on Alasdair’s courses and crafts please visit https://littleacornfurniture.com
https://en.wikipedia.org/wiki/Forestry_in_the_United_Kingdom#cite_note-:0-4
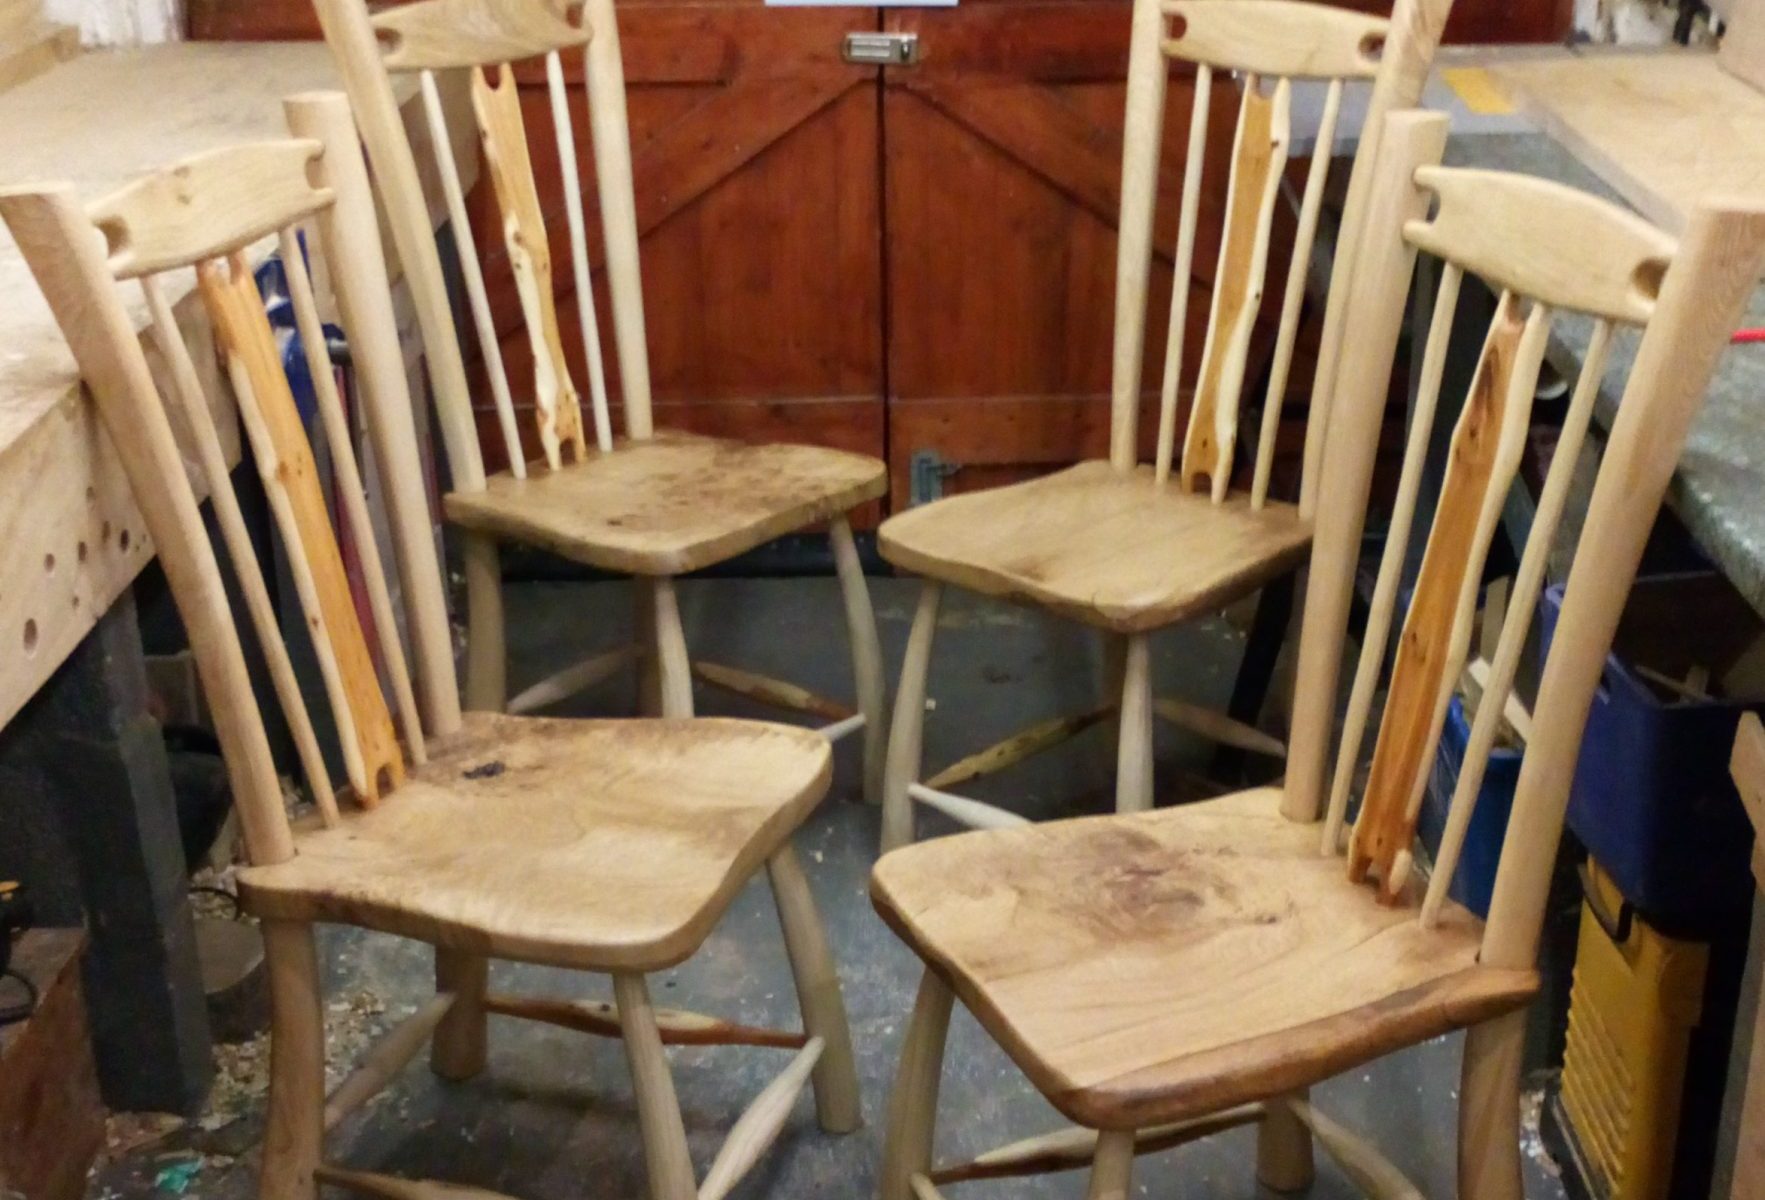
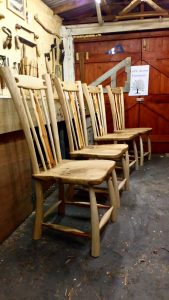
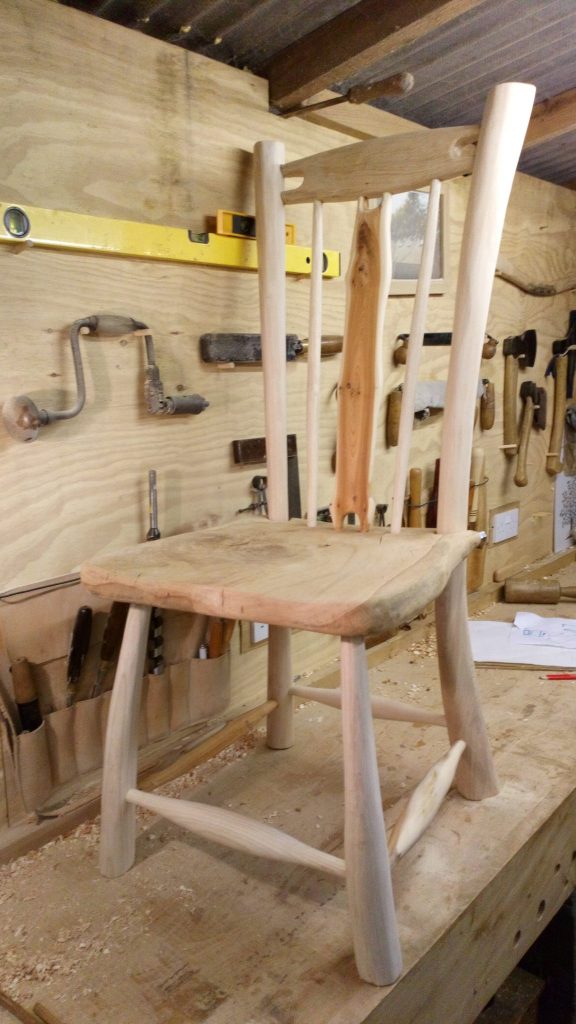
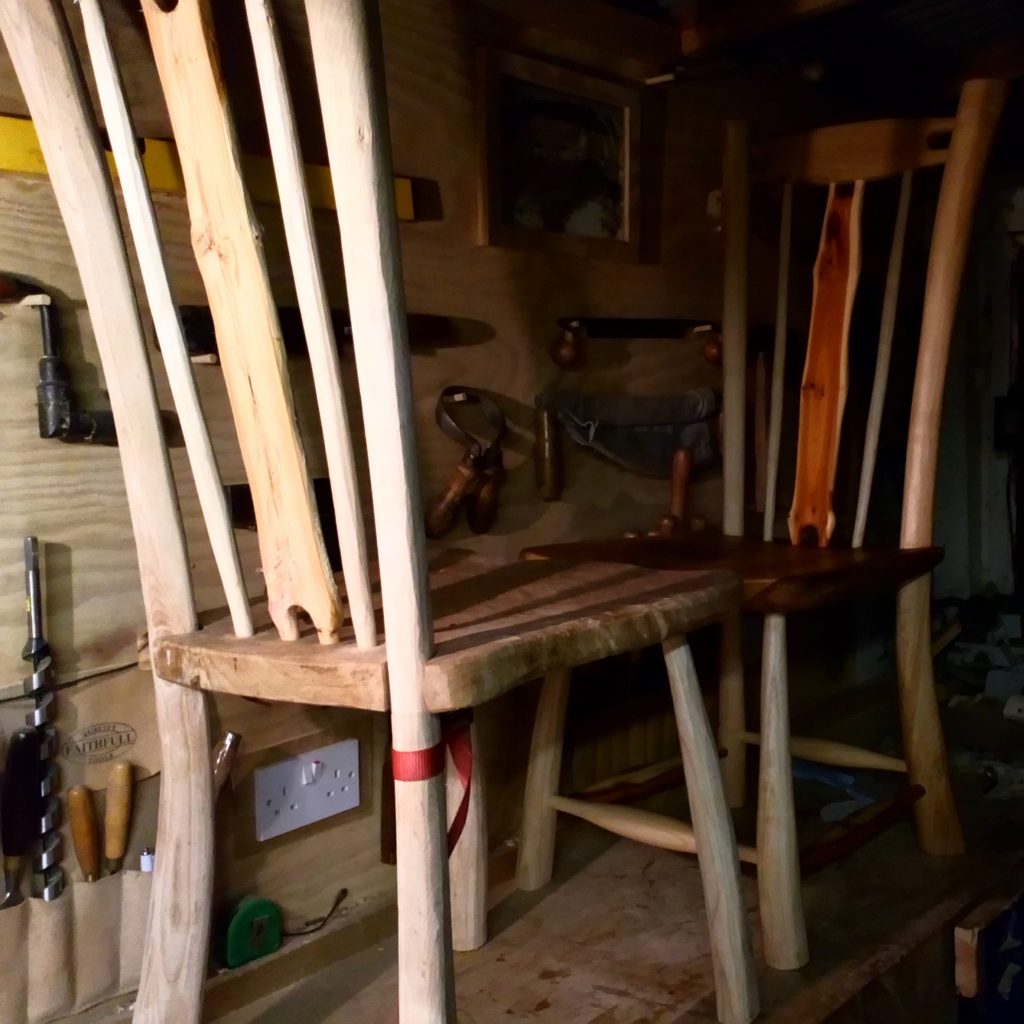
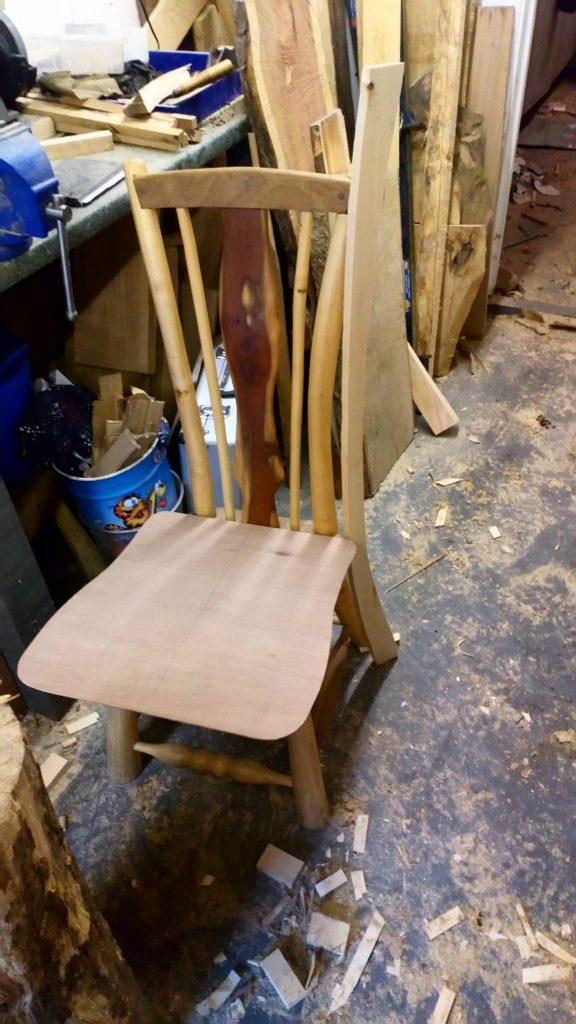
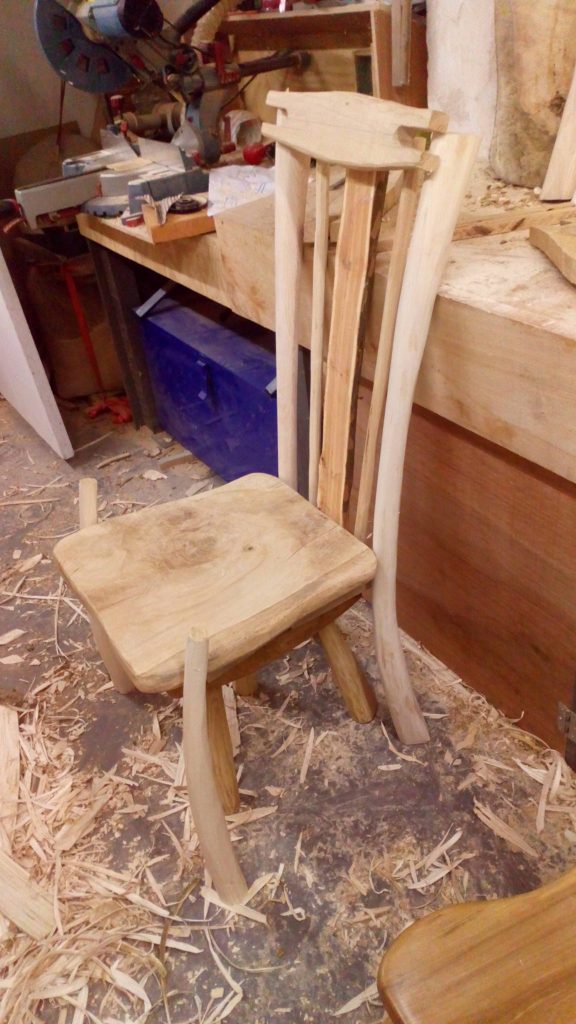
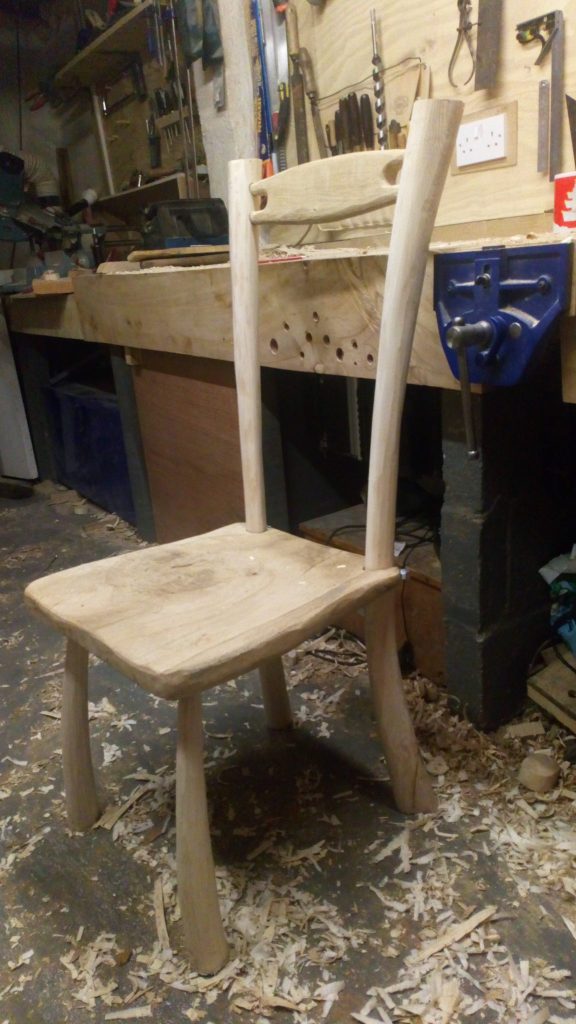
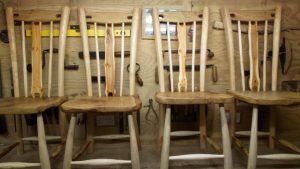 The biggest technical challenge was then to get the geometry of the already individual chairs to be the same. It was specified that two chair seats be approximately 2 cm higher than the others whilst the backs remained the same overall height. The chairs were all assembled individually and the latest chair checked against the previous ones for accuracy. For the first chair several mock ups were made until I had worked out a combination of angles that seemed to give the correct feel and appearance. The first chair was by far the most challenging and set the bench mark for the others.
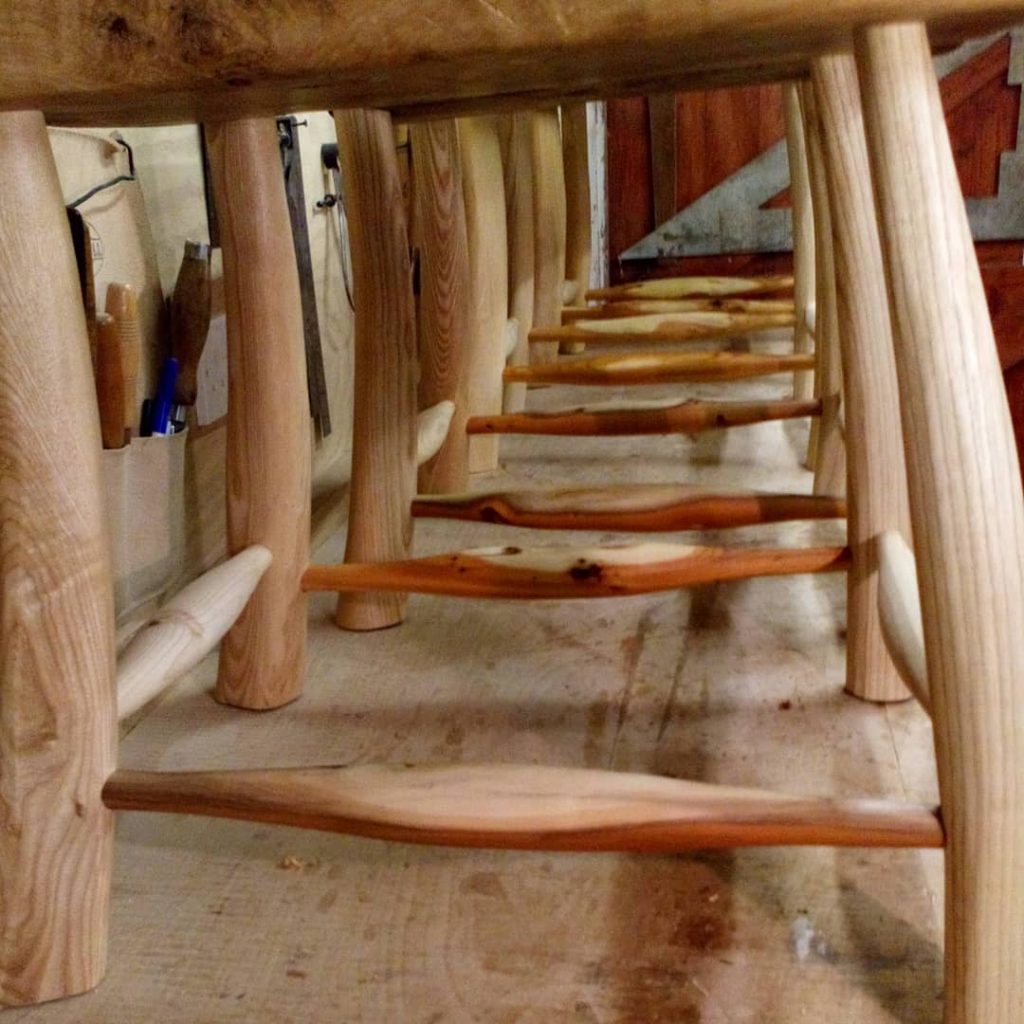
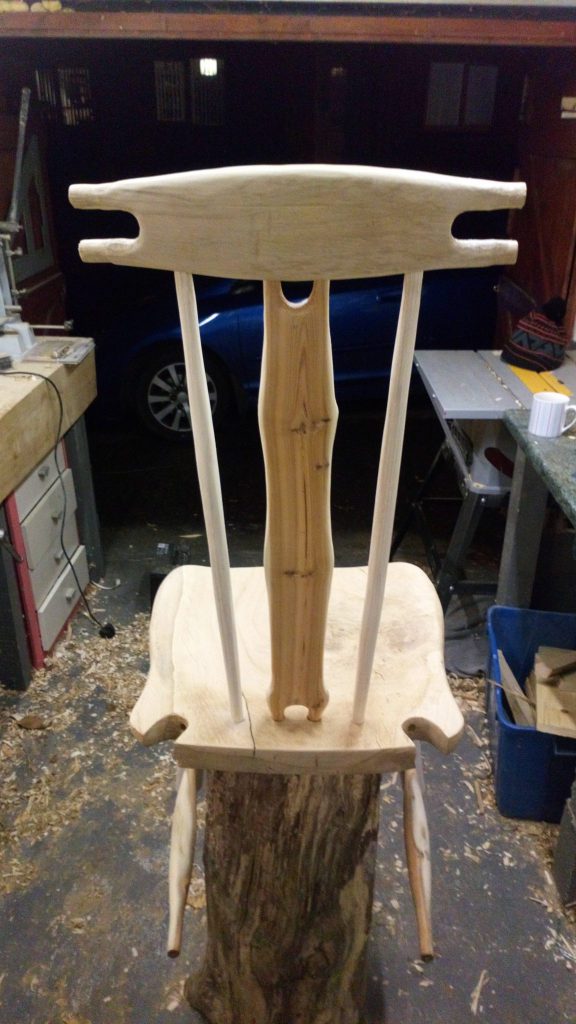
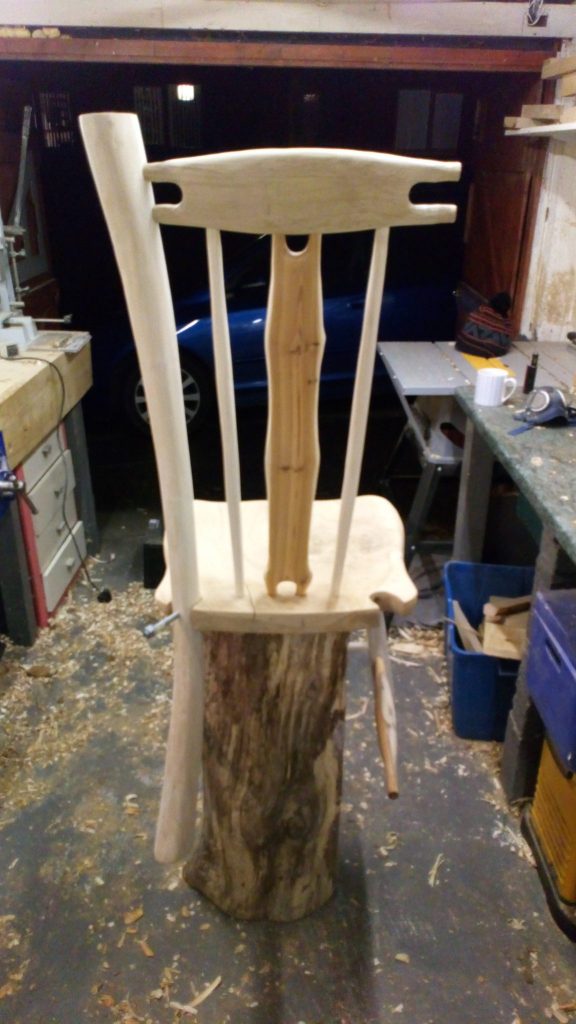
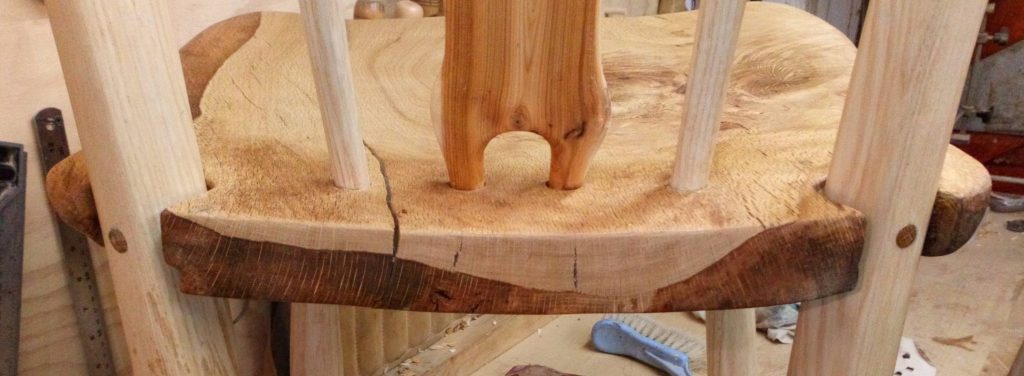
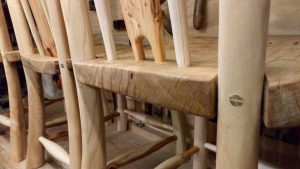 A critical design element was to use only round mortise and tenon joints for all components, the stretchers have two, one at each end, the front legs have two mortises for the stretchers and a single ‘blind wedged’ tenon into the seat. The rear legs have a total of five mortises each, two each for the comb and stretchers and a through mortise for securing to the seat slab.
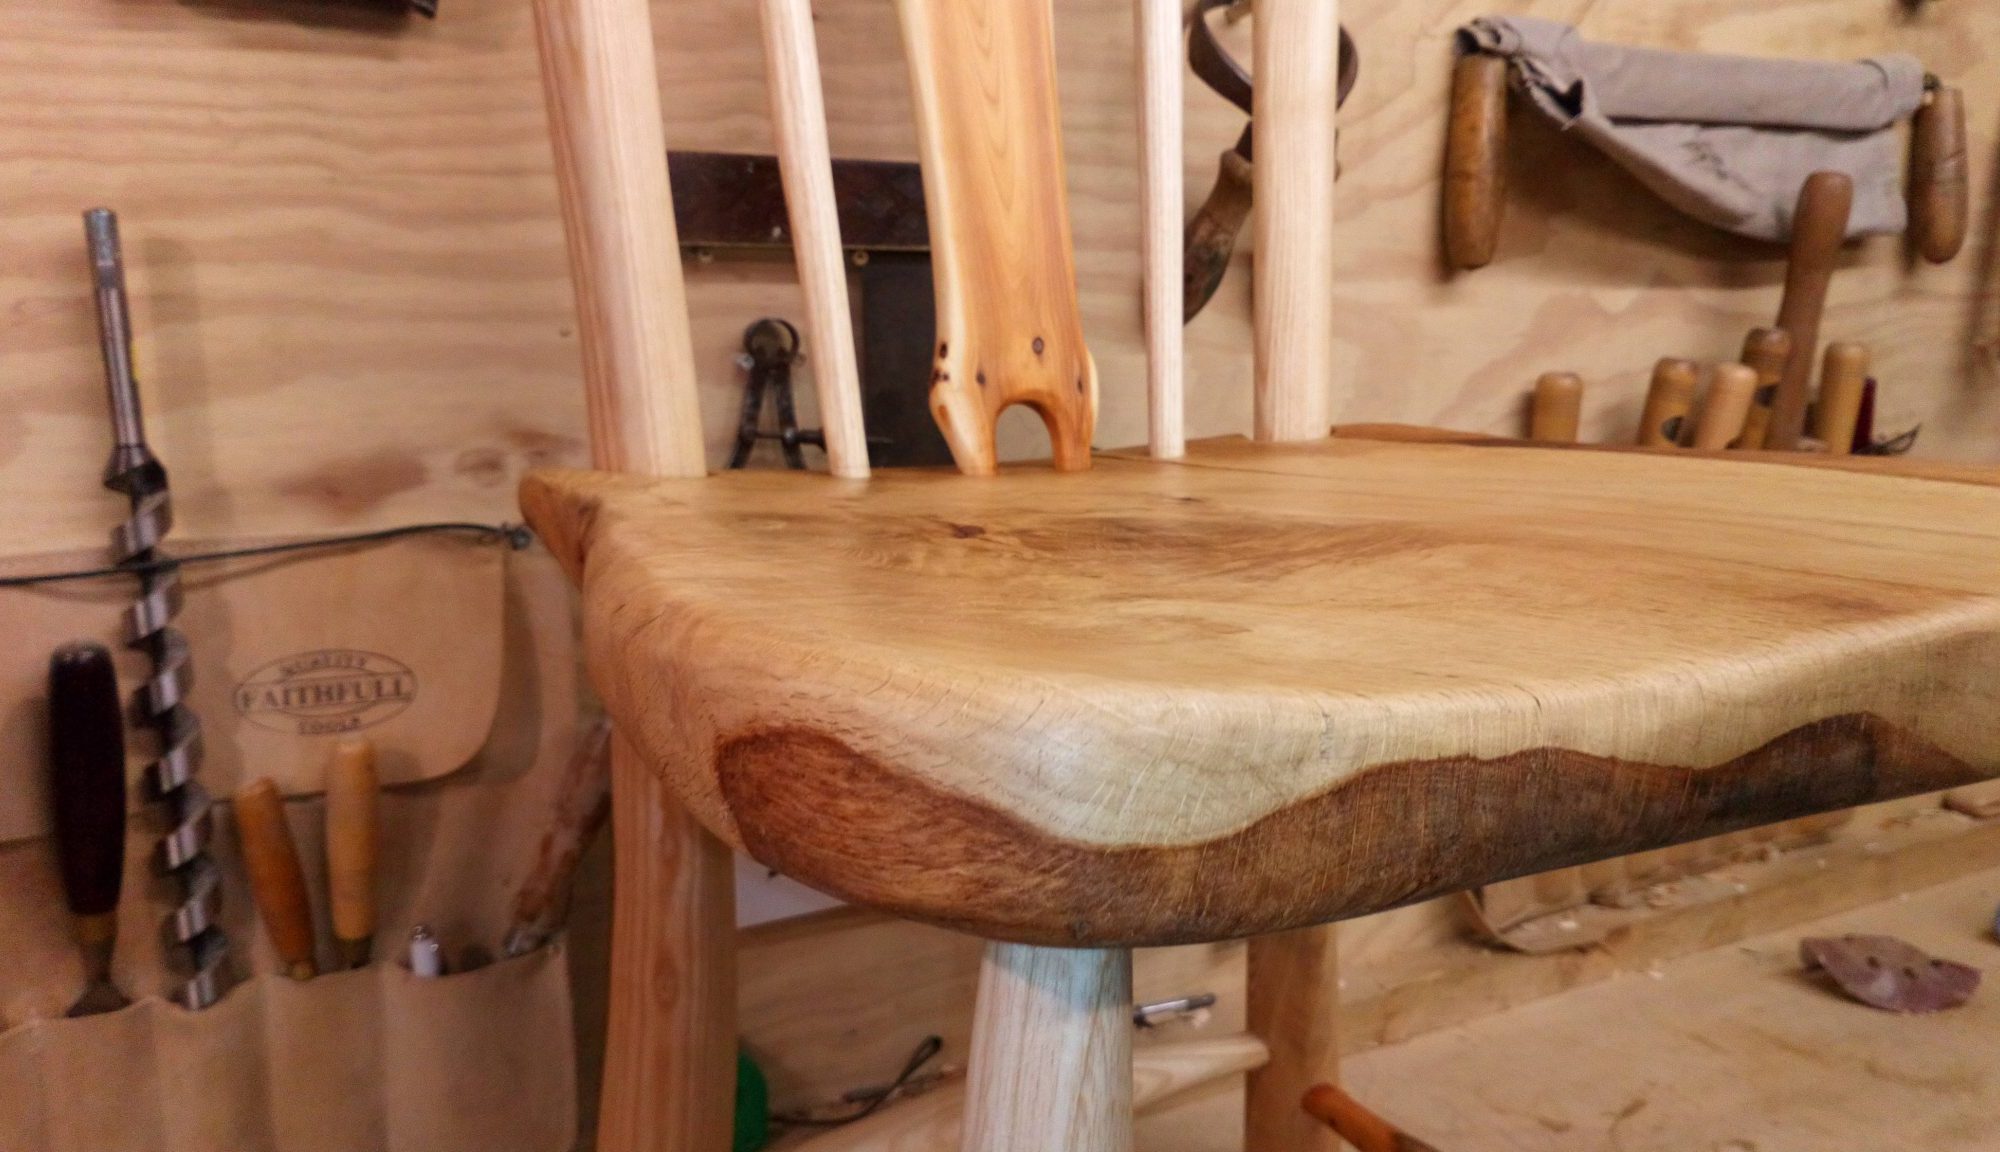
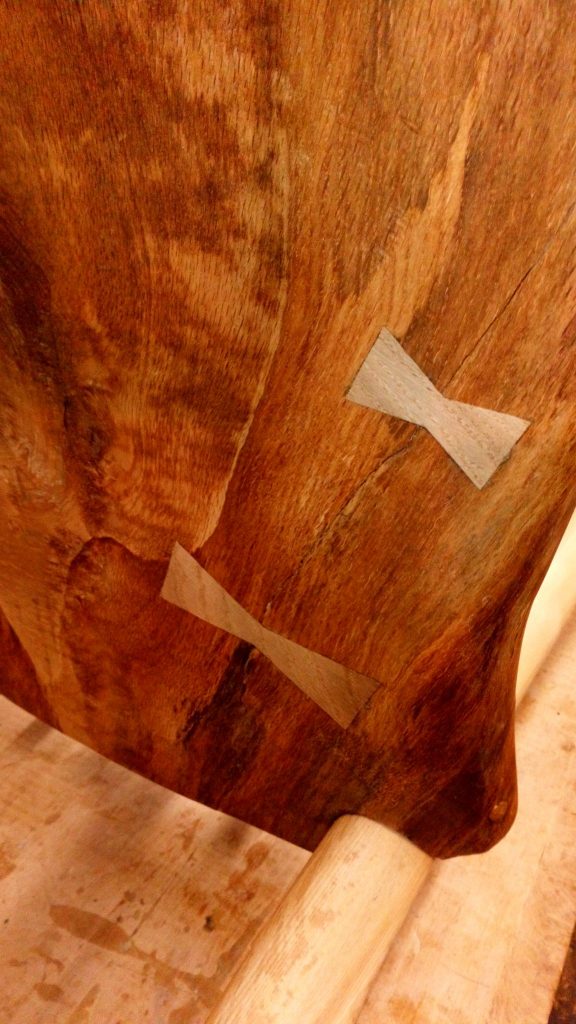
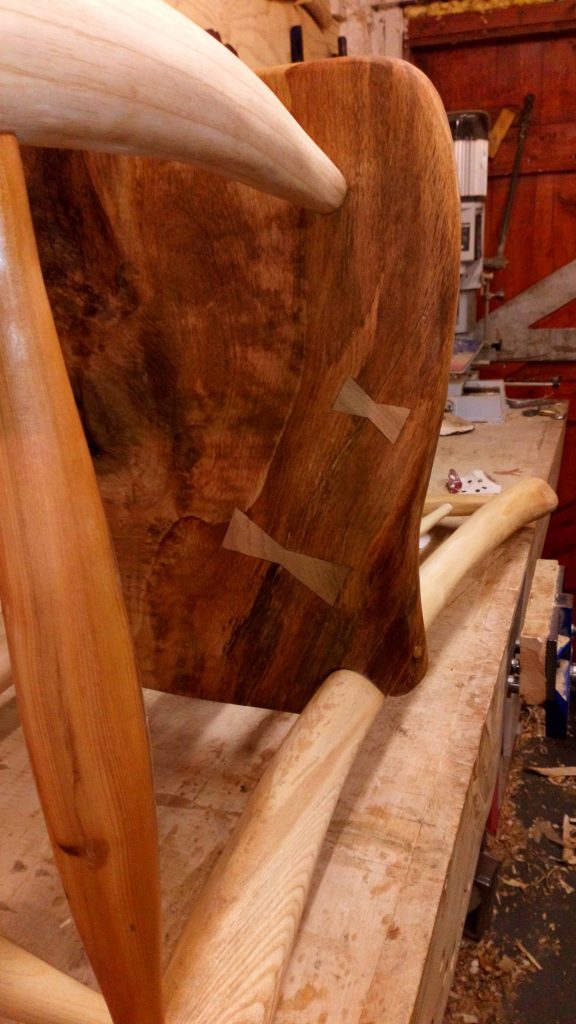
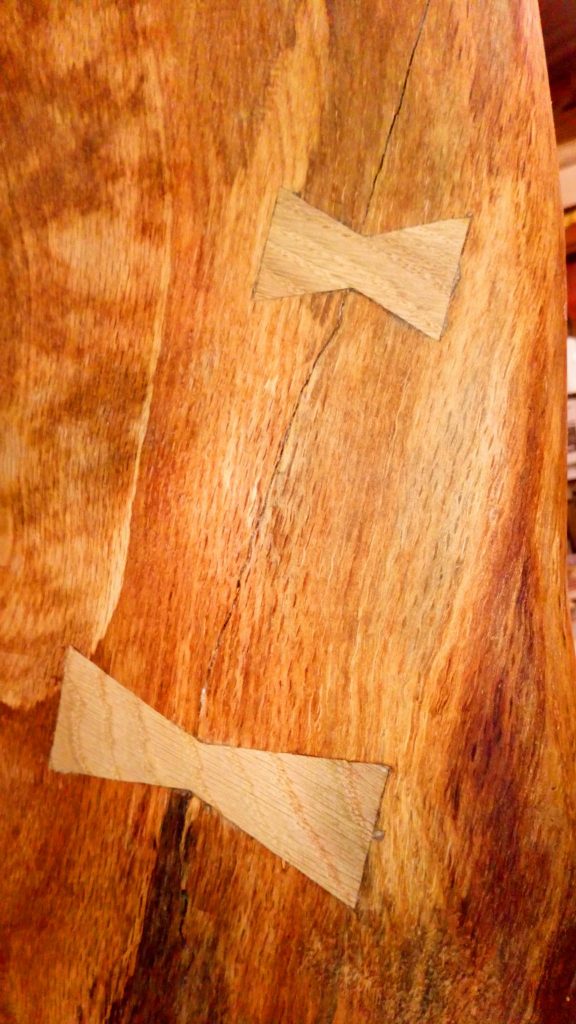
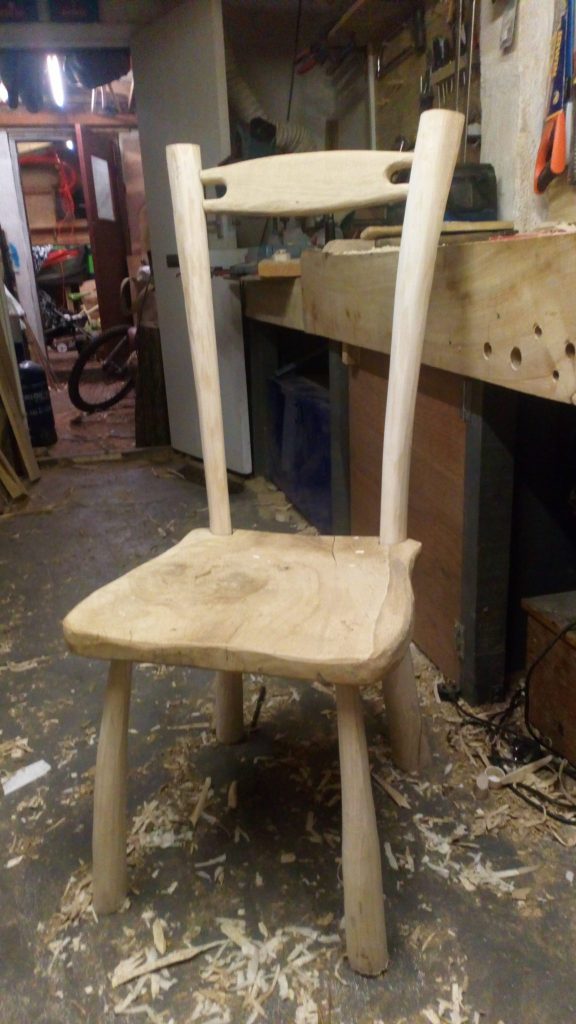
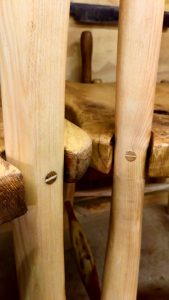 The ash wedges used in the visible oak pegs on the rear legs is also something new for a chair, I have secured table tops in the is way in the past but never with such contrasting materials. Securing the back legs in this way was supposed to be quicker and easier than adding stretchers directly below the seat, I am not at all sure if this was the case. I feel that it is a more elegant and equally robust solution, that I will be continuing to refine and use.